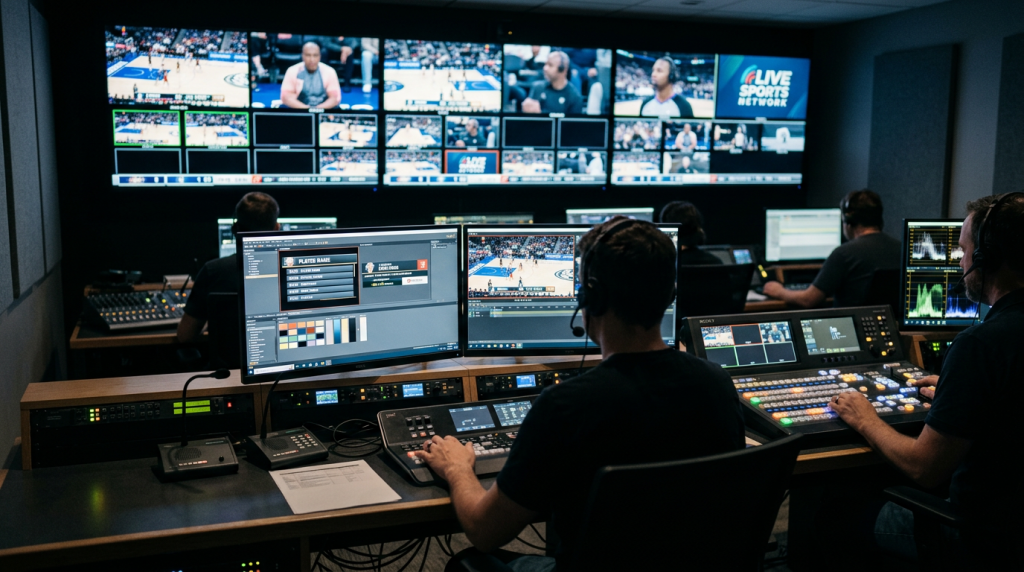
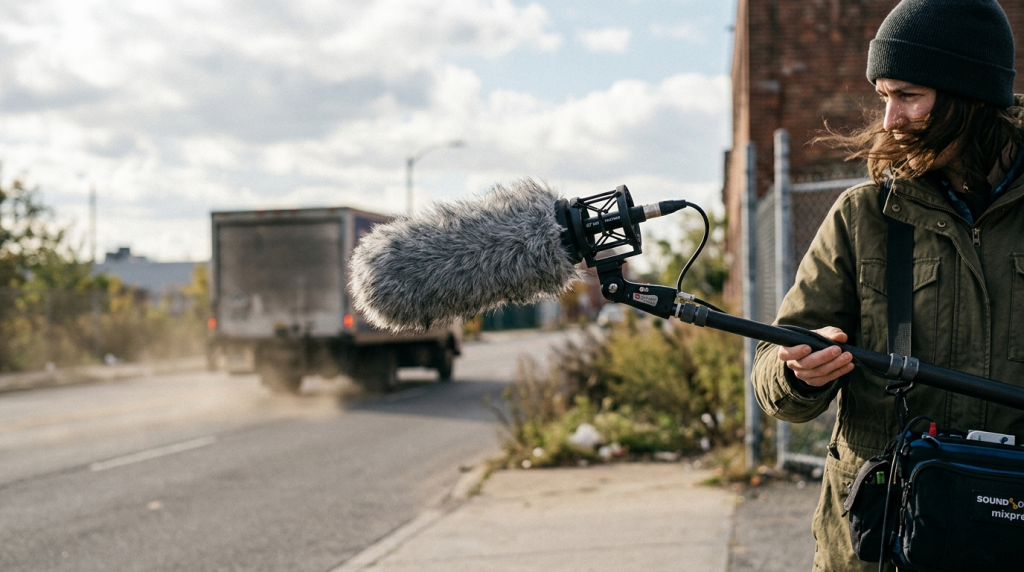
Wind and unwanted air movement are among the simplest things that can ruin a recording, whether in a broadcaster’s booth or on a windy film set. This guide to microphone windshields walks through the full range of microphone windshields, explaining how they work, how they differ, and where each design belongs in a professional workflow.
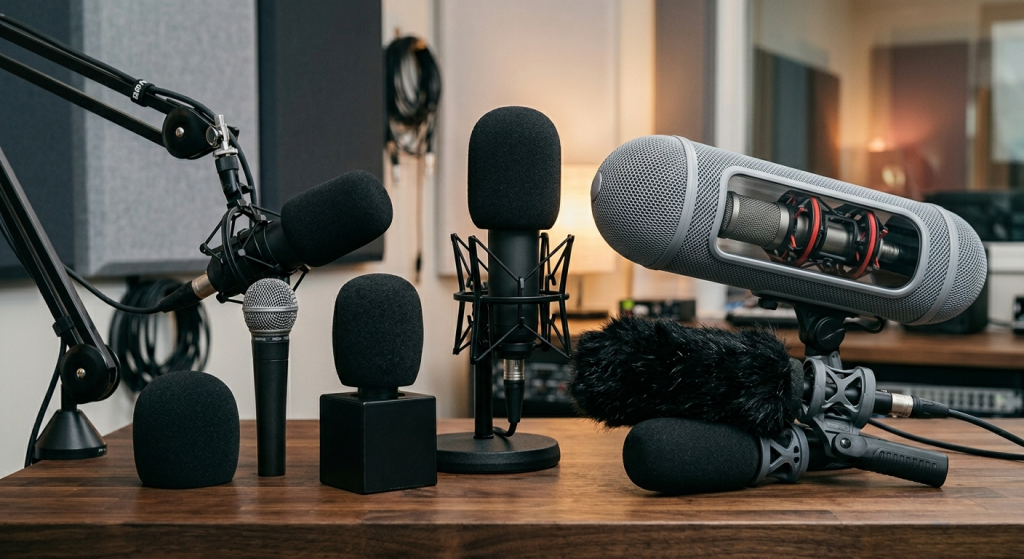
Table of Contents
Why microphone wind protection matters
Wind creates low-frequency pressure fluctuations that microphones interpret as rumble and noise rather than sound. That noise masks detail, raises the noise floor, and forces more processing later – often to the detriment of tone and clarity.
Beyond steady wind, plosives and breath blasts from close speech also produce momentary overloads and distortion. Using proper wind and pop mitigation preserves transient detail and reduces the need for aggressive equalization or gating.
What is a microphone windshield?
The basic answer to what is a microphone windshield is straightforward: it’s an accessory that reduces the impact of moving air on the microphone capsule. Windshields serve as the first line of defense against pressure spikes while allowing desired sound to pass.
Windshields come in many forms and materials, each tuned to particular noise profiles and mic types. The goal is always the same – minimize airflow-induced artifacts while maintaining natural frequency response and off-axis behavior.
Anatomy and acoustic principles
Windshields work by dispersing and slowing air currents before they hit the diaphragm. Porous materials, dense fur, or multi-layer enclosures turn turbulent gusts into a gentler, laminar flow that produces far less acoustic energy at low frequencies.
From an acoustic standpoint, the trade-offs involve attenuation at low frequencies and potential alterations to high-frequency response. Good designs minimize coloration while achieving substantial reduction of infrasonic and subsonic energy that causes rumble.
Overview of common windshield types
There are four broad categories you’ll encounter: foam windscreens, furry covers (often called windjammers or “dead cats”), rigid blimps/zeppelins with internal shock mounts, and pop filters. Each category addresses distinct problems and microphone form factors.
Within those categories exist subtypes and hybrids: fleece-covered foam, dual-layer furries with inner foam, and compact pelts for lavalier mics. Knowing the differences helps match the windshield to the environment and microphone design.
Foam windscreen for microphone
Foam windscreens are molded open-cell foam sleeves that slip over handheld or small condenser capsules. They are lightweight, inexpensive, and effective against plosive bursts and light breeze for outdoor handheld work.
Foam excels at reducing popping and breath noise without adding substantial high-frequency attenuation, which makes a foam windscreen for microphone a common choice in studios and ENG (electronic news gathering) situations.
Furry covers and windjammers
Furry covers have a dense exterior pile that breaks up and diffuses strong gusts before they reach the internal foam layer or capsule. These “dead cat” style covers are the go-to for windier environments such as field production and outdoor interviews.
Because of their bulk, furries add more physical mass and wind buffering than simple foam, and they perform well when wind speeds are moderate to high. Properly fitted furries preserve tonality while substantially reducing low-frequency rumble.
Blimps, zeppelins, and suspension systems
Blimps pair a rigid cage or shell with an internal shock mount and usually a layered windshield system. They isolate the microphone from handling noise and provide superior wind attenuation for shotgun mics and sensitive condensers used outdoors.
These assemblies are heavier and require accessories like boompoles and mounts, but they offer the cleanest outdoor capture when mobility and sound quality are both priorities, particularly for film and documentary work.
Pop filters and spoken-word shields
Pop filters – typically a mesh or metal screen mounted between a vocalist and the microphone – are specialized for plosive control in studio settings. They mitigate rapid pressure spikes from consonants like “p” and “b” without altering the microphone’s directional characteristics.
While not optimized for ambient wind, a pop filter can complement other wind protection in controlled environments where breath and mouth noise are the chief concerns.
Materials and construction: why open-cell foam and synthetic fur work
Open-cell polyurethane foam is porous, allowing sound to pass while scattering air movement. The pore structure slows airflow and converts kinetic energy into tiny pressure changes, which are acoustically less damaging to a diaphragm than a direct gust.
Synthetic fur uses a dense pile to break the wind into micro-turbulences that dissipate before they reach the mic. Many commercial furs pair that outer layer with an inner foam or mesh to provide a two-stage attenuation network for superior low-frequency control.
Matching windshields to microphone types and use cases
Handheld dynamic mics often perform well with a simple foam windscreen for microphone because they are less sensitive and designed for close work. For broadcast and voiceover studios, foam reduces plosives without much change to tone.
Shotgun and small-diaphragm condenser mics, used on booms or in the field, benefit from blimps and furry covers because of their sensitivity and exposure to directional wind. Lavalier mics require tiny, dedicated pelts or foam capsules to remain discreet while protected.
Studio recording and voice work
In studio environments, the principal concerns are plosives and breath. Pop filters and foam windscreens are the standard choices, because they address fleeting bursts while preserving the mic’s acoustical fingerprint.
For critical vocal sessions, engineers often test both options on the same vocalist to hear differences in proximity effect and high-frequency presence, selecting the solution that balances protection with tonal fidelity.
Field production and ENG
For news, documentary, and outdoor interviews, consistent wind mitigation is essential. A combination of blimps for boomed shotgun mics and furries for handhelds or lavaliers gives robust microphone wind protection across typical on-location scenarios.
Field crews also prioritize quick changes and secure fit; accessories that clamp or zip reliably to a mic body reduce time wasted re-fitting and lower the risk of wind-induced noise during a take.
Live sound and stage use
On stage, wind is less often an issue, but breath and movement can cause plosives and handling noise. Foam windscreens are common on handheld mics for singers and presenters, and they also provide a hygienic surface replacement between performers.
Stage engineers must balance air capture with the mic’s polar pattern; any windshield that significantly alters the off-axis response can introduce feedback or change the blend in monitors and FOH mixes.
Performance testing and measurement
Evaluating windshield performance requires both subjective listening and objective measurement. Spectral analysis of a test tone with and without the accessory reveals reductions in low-frequency energy and any coloration introduced.
Practical tests include controlled wind sources or consistent outdoor conditions, recording the same signal with identical mic placement. Listening for rub, rumble, and transient integrity provides a useful complement to the numbers.
Installation, fit, and mechanical considerations
A proper fit matters as much as material. Stretching foam beyond its designed diameter weakens its structure and creates gaps that let air through, while poorly fitted furries can flap and add noise in gusty conditions.
Attachment systems range from simple slip-on designs to secured collars, velcro, and locking rings. Choose solutions that preserve the mic’s polar pattern and allow quick removal for maintenance or transport.
Maintenance, cleaning, and longevity
Foam windscreens tolerate gentle washing with mild detergent and air drying; avoid wringing or heat that can deform the foam. Proper care extends usable life and prevents buildup of oils and microbes that can degrade performance.
Furry covers should be brushed and stored dry. UV exposure and repeated compression will eventually break down synthetic fur and inner foam, so inspect coverings regularly and replace them on a schedule dictated by usage rather than waiting for failure.
Compatibility, sizes, and universal fits
Manufacturers often produce windscreens to fit common microphone diameters, but universal options exist that compress to smaller sizes or expand over larger heads. Still, a close fit usually gives better attenuation and less tonal change.
For small-lavalier applications, tiny pelts and micro-foam capsules are specific to the mic’s grille. When replacing or adapting parts, confirm grille dimensions and mounting methods to ensure the windshield does not touch the capsule directly.
Mic windshield guide: choosing the right option
Start by listing the primary noise source: steady wind, plosives, handling, or a combination. If outdoor wind dominates, prioritize multi-stage solutions like blimps and furries. For speech in controlled spaces, foam or pop filters often suffice.
Also weigh practical factors: cost, ease of use, weight, and hygiene. A microphone accessories kit that includes a small range of windscreens allows teams to adapt quickly as conditions change on a shoot or recording day.
DIY alternatives and safe improvisation
When professional parts aren’t available, improvised windscreens can be useful short-term fixes. Soft foam from packaging or clothing materials can dampen plosives, and pantyhose over a ring remains a longstanding pop filter technique for studio vocals.
DIY solutions should avoid contact with the capsule and never obstruct vents or ports intentionally designed for mic operation. They are stopgaps, not replacements for purpose-built microphone wind protection in critical recordings.
Troubleshooting common problems
If you still hear rumble after fitting a windshield, check for leaks where the cover meets the mic body and ensure the windshield isn’t compressing against the grille. Mechanical contact can create vibration noise that mimics wind issues.
Coloration or loss of high-frequency detail often indicates a thick or mismatched material. Swapping to a thinner foam or a different pelt configuration usually restores clarity without sacrificing low-frequency control.
Accessory ecosystem: how windscreens fit with other microphone accessories
Windscreens rarely work in isolation; they are part of a larger accessory suite that includes shock mounts, boompoles, pop filters, and windshields’ storage solutions. Combined, these items solve multiple noise sources at once.
Choosing microphone accessories as a system – for instance matching a blimp’s internal suspension to the mic’s weight – prevents secondary problems like handling noise or microphone tilt under load.
Cost, durability, and professional considerations
Price often reflects materials, precision of fit, and professional features such as exchangeable inner linings or weather-resistant treatments. Higher-end solutions are designed for heavy daily use and quick servicing in the field.
Durability considerations matter for rental houses and crews. Air-exposed components degrade over time, so plan inspections and replacements into your maintenance cycle rather than relying on a last-minute purchase during a shoot. Standard sizes for common broadcast mics keep re-orders simple – our branded foam windscreens cover the usual handheld diameters.
Environmental factors and extremes
Temperature and humidity affect foam elasticity and fur performance; prolonged cold makes foam brittle while damp conditions can saturate pelts and reduce their effectiveness. Design choices should match the primary climate where the gear will be used.
Salt air, sand, and heavy dust require rugged housings and frequent cleaning. In these environments, a blimp with replaceable inner windscreen elements is often preferable to a single-piece solution that must be discarded after contamination.
Standards, labeling, and specifications to look for
Manufacturers sometimes list attenuation curves or wind-test results; these can help compare options but must be interpreted cautiously. Look for third-party measurements or in-house tests that use consistent methodology for apples-to-apples comparisons.
Other useful specs include diameter and depth, recommended microphone types, and mounting compatibility. Clear labeling reduces setup mistakes and speeds field changes during fast-moving shoots.
Case studies: typical setups for different productions
Documentary crews often pair a lightweight shotgun with a blimp and fur when shooting outdoors and a lavalier with a micro-pelt for on-camera interviewees. This combination addresses both ambient wind and proximity noise with minimal visible hardware.
Podcasters who record outdoors may choose a handheld dynamic with a snug foam windscreen and a portable windshield stand to keep the mic stable. The aim is to preserve voice intimacy while preventing gusts from dominating the recording.
Comparative summary
| Type | Best for | Strengths | Limitations |
|---|---|---|---|
| Foam windscreen for microphone | Studio vocals, handheld speech | Lightweight, inexpensive, good for plosives | Limited against strong wind |
| Furry cover / windjammer | Outdoor interviews, field production | High wind attenuation, minimal coloration | Bulkier, needs correct fit |
| Blimp / zeppelin | Shotguns on booms, film location sound | Best overall wind and handling isolation | Heavy, requires mounts and space |
| Pop filter | Studio voice work | Excellent for plosives without strong HF loss | Not designed for ambient wind |
The table condenses core trade-offs but doesn’t replace listening tests. Field verification remains the most reliable way to determine what will work in a specific production scenario.
Always consider the whole signal chain – mic type, preamp noise floor, and post-production limits – when selecting windshields and other microphone accessories.
Guide to microphone windshields: final remarks and practical checklist
This mic windshield guide underscores a simple truth: correct selection and care of wind protection preserve tone and save time. Choosing the right windshield reduces noise at the source and avoids heavy-handed fixes during mixing and mastering.
Use the following checklist on set or in the studio: confirm the mic type, identify dominant noise sources, test candidate windscreens under real conditions, and inspect attachments for a secure, gap-free fit. Regular maintenance and sensible storage will keep your wind protection ready when you need it.
Wind will always be part of location sound and live environments, but with the right tools and methods – from a foam windscreen for microphone to a full blimp array – you can capture clear, usable audio more consistently. This practical balance between materials, mounting, and matching to task is the essence of effective microphone wind protection.
FAQ: guide to microphone windshields
What is the difference between a foam windscreen and a furry windshield for microphones?
Foam windscreens are open-cell sleeves that handle plosives and light airflow well – they are the standard choice for studio voice work and handheld ENG mics in calm conditions. Furry covers, often called dead cats or windjammers, add a dense exterior pile that breaks up stronger gusts before they reach the capsule, making them the right tool for outdoor interviews and field production in moderate to strong wind. The two are not interchangeable: foam starts to lose effectiveness around Beaufort 3-4, where furries take over.
Do I need a blimp if I already have a furry windscreen on my shotgun mic?
It depends on the environment and the mic. A furry cover directly on a shotgun mic handles many outdoor conditions, but a blimp adds two things a furry alone cannot: internal shock mounting to eliminate handling and boom vibration, and a rigid acoustic cavity that further reduces turbulence before it reaches the capsule. For documentary and film boom work where both wind and handling noise are present, a blimp with a fur over it is the more reliable setup. Solo ENG operators who need fast moves and minimal kit can often manage with a high-quality furry directly on the mic.
Why is my recording still picking up wind rumble even with a windshield fitted?
The most common causes are a poor mechanical fit and capsule contact. If the windshield compresses against the grille, it can transmit vibration directly to the diaphragm rather than isolating it. Gaps where the foam or furry meets the mic body also let turbulent air through. Check the fit first – then consider whether the windshield type is appropriate for the actual wind speed. No foam windscreen will protect against strong gusts; that is a physics limitation, not a manufacturing defect.
Can I use the same windshield on different microphone models?
Universal windscreens exist and can stretch to fit a range of diameters, but a close, purpose-fit windshield consistently gives better attenuation and less tonal coloration. The acoustic seal between the windshield and mic body is part of what makes the protection work. For lavalier mics in particular, the micro-foam capsules and tiny pelts are specific to grille dimensions – using an oversized cover on a lavalier risks both acoustic degradation and unwanted mechanical noise from the loose fit.
How often should foam windscreens and furry covers be replaced?
Replace on usage schedule, not when failure is obvious. Foam degrades through UV exposure, repeated stretching, and cleaning cycles – a foam windscreen that looks intact can already have compromised cell structure that reduces its attenuation. Furry covers lose pile density and inner foam resilience over time. For broadcast kits in daily use, inspecting windscreens every three to six months and replacing them annually is a reasonable baseline. Waiting for audible degradation means you have already recorded with compromised protection.